


Great service with speedy delivery and superb customer service. I would highly recommend

How to Use Public EV Chargers: A Beginner’s Guide
You’ve got your new electric car. You’re all excited. But then you realise you’ll have to charge in public at some point and you’ve no idea what to do.
Even if you’re a technophobe, our no-nonsense guide to using public EV chargers tells you everything you need to know, step by step. Let’s go.
THE BASICS
Read This First
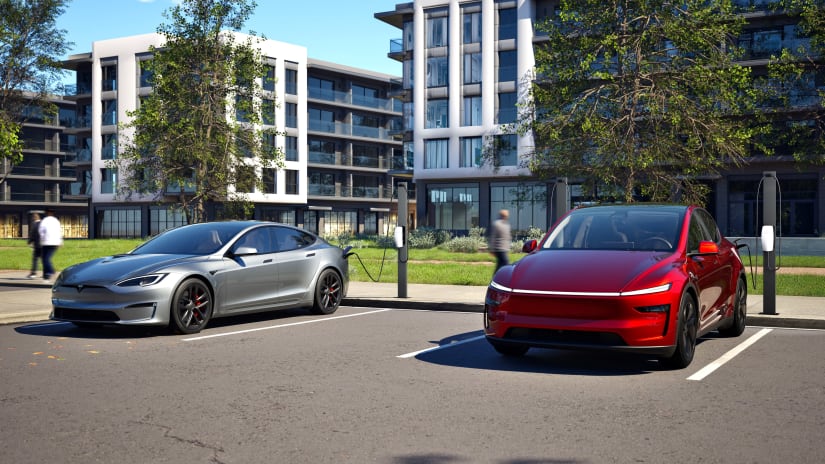
Where is the charging socket on my car?
Confusingly, your car’s charging socket can be in several different places, for example:
- Left-hand side at the rear
- Left-hand side at the front
- Right-hand side at the rear
- Right-hand side at the front
- Front of the car in or near the middle
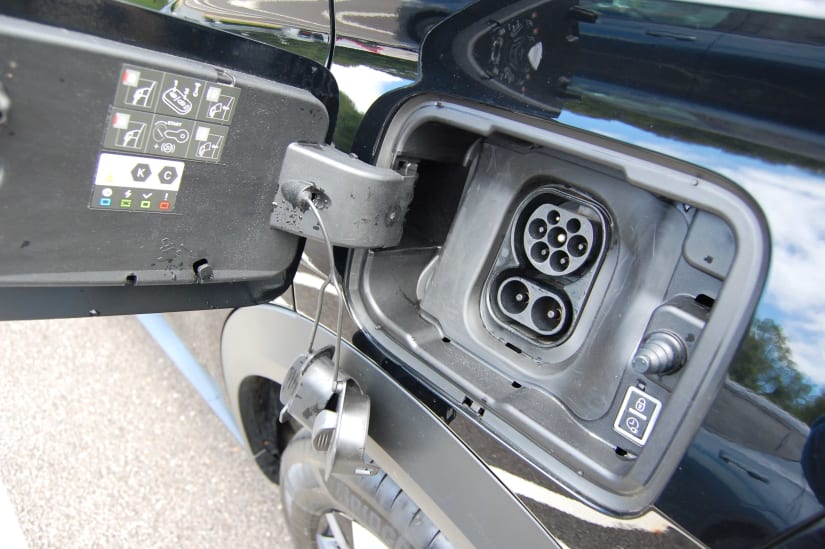
Check now where your charging socket is. There will be a flap covering the socket. To open it, you normally push the flap and it pops open. Alternatively, you might use the car’s app to open it and/or use your car’s touchscreen/display.
Once the flap is open, there may be additional plastic covers in the socket – open or remove these so you can see what the actual socket looks like.
Where are the public EV chargers?
If you want to use a public charger, you need to know where they are.
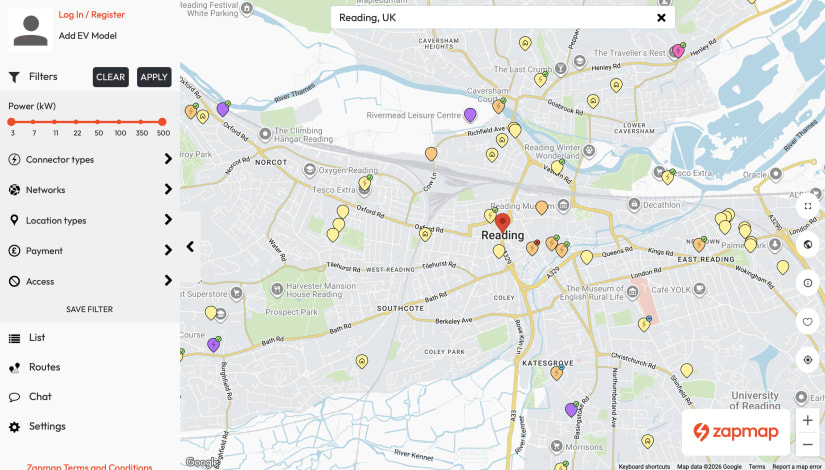
One of the most convenient tools to locate public chargers is the Zapmap web page or the Zapmap app which you can download to your smartphone.
Try Zapmap now. Add your electric car model to the settings. Use the filters to tailor the app to your situation. Get to know where chargers are near you. Or, if you’re planning a trip, see where chargers are en route.
You’ll find public EV chargers in many handy locations, including motorway services, supermarket car parks, retail parks, public car parks, hotels, restaurants, gyms, workplaces, train stations, airports, residential streets, and even built in to lampposts.
Which charging cable do I need?
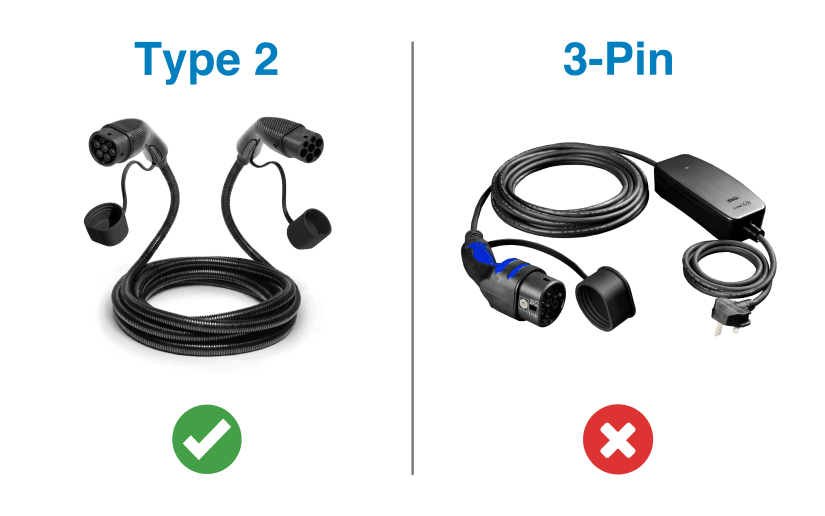
Most EVs come with, or can be supplied with, a charging cable known as a ‘Type 2’ cable.
You may also have a 3-pin plug charger, but you don’t use this type of cable for charging in public.
Take a look at the image to see the difference between these charging cables.
Very important: Make sure your charging cable (Type 2) is always in your car’s boot. If you forget it when you want to charge in public, you may not be able to charge at all. Some public chargers do have their own cable and plug permanently attached, others don’t.
SLOWER TOP-UPS
Charging When You’re Out and About Locally
What will you learn in this section?
How to charge your car in public using a standard charging point. This type of charging point is similar to what you might have at home, if you got a home charger professionally installed.
Where are these chargers located?
You can find them in car parks, shopping centres, gyms, restaurants, and other locations where you might stay for a few hours.
Why would someone want to use one of these chargers?
You might be a bit low on charge and want to top up while you are in town doing something else. For example, if you are out shopping for a couple of hours, you could add useful extra range – perhaps around 50 miles on a typical charger, depending on your car and the charger speed.
Step 1 – Park your car
Park your car in a designated EV charging parking space. These spaces are usually very clearly sign-posted and easy to find.
If you’ve done your homework above, you will already know where your car’s charging socket is – make sure you park so that the socket is close to the charger (you may need to reverse into the space).
Step 2 – Read the instructions and get your cable ready
Before connecting your cable or starting payment, read the instructions on or next to the charging point itself.
Different chargers do things in different orders. Most standard public chargers ask you to connect your Type 2 cable and then start the session using a credit/debit card, app, or RFID card. Some chargers may ask you to start or authorise the session first, then connect the cable.
Most standard public chargers do not have a cable attached, so you need to get your own Type 2 cable out of your boot.
Some chargers, on the other hand, do have a Type 2 cable permanently attached. If this is the case, you do not need to use your own cable.
If the plug attached to the charging point is much larger than a Type 2 plug, you’re probably at a ‘rapid’ charging station – scroll down to the rapid charging section below to find out what to do.
Step 3 – Connect the cable and authorise the session
Now follow the instructions shown on the charger in order.
If the charger tells you to connect the cable first, plug one end of your Type 2 cable into the charging point and the other end into your car’s socket. You will first need to open the flap that protects your charging socket, and possibly open or remove those plastic covers if you have them. Then follow the payment or authorisation instructions on the charger.
If the charger tells you to authorise the session first, tap your credit/debit card or phone in the designated area, or use the app, QR code, or RFID card if required. Then, when the charger tells you to, connect your Type 2 cable to the charging point and your car.
If the charger has a Type 2 cable permanently attached, simply grab the plug and insert it into your car’s socket when the charger tells you to.
Step 4 – Follow any further instructions
Once the cable is connected and the session has been authorised, the charger may start charging automatically. If it doesn’t, the charger screen – or your app – may ask you to press a button that says ‘Start Charging’ or similar.
Please note:
- Some slower chargers, and some older chargers, may not have contactless payment. They may require an app, QR code, or RFID card instead. Read the instructions carefully before you start.
Important:
- If using a QR code, check it has not been stuck over another code. If it looks suspicious, use the official app, the contactless reader, or the operator’s website/app instead.
- Some chargers place a temporary pre-authorisation hold on your card before charging starts. You should only be charged for the electricity you use, but the temporary hold may take a little while to disappear from your banking app.
- If the screen on the charger is blank, or there is an error code, the charger may be broken. There should be a phone number on the charger you can call for help. If that doesn’t work, try another charger.
Step 5 – Check charging has started
Once you think you’ve got charging going, you then have to double-check the car really is charging.
There are different ways to confirm charging is taking place, depending on the specific charger you are using:
- Look at the charging point display if it has one – it should say ‘Charging in Progress’ or similar.
- Look at one of the displays inside your car – it should say that charging is taking place.
- If you used an app to set up the charging, the app should confirm that charging is in progress.
Step 6 – Leave the car
Now the car is charging, you can go off and do your shopping, visit the gym, eat at the restaurant, etc. You don’t need to sit in the car while it’s charging, though you should lock the doors.
Important:
- You should check the parking signs as well as the charger instructions. Some EV bays have time limits, parking charges, overstay fees, or rules saying you must move the car once charging has finished.
Step 7 – Return to the car and stop charging
When you’ve finished doing what you’re doing, return to your car.
Follow the instructions on the charging point to stop the charge. There may be a ‘Stop Charging’ button, or the charger may ask you to tap the same card again, use the same app, or use the same RFID card to stop the charging session.
After a few moments, charging will stop and the display or app should confirm this.
Please note:
- If your car’s battery reaches 100%, the car will stop accepting charge, though you may still need to press a button, tap your card, or use the app to formally stop the charging process.
Step 8 – Unplug your cable
Once charging has stopped, you should be able to unplug the cable.
If you used your own Type 2 cable, unplug it from both the charging point and your car, then put the charging cable back in your car’s boot.
If the charger had its own Type 2 cable attached, remove the plug from your car’s socket and put the plug back where you originally took it from on the charger.
Don’t forget also to close the flap that covers your car’s charging socket. This happens automatically on some EVs.
Important:
- If you can’t unplug the cable, don’t pull hard. First check that the charging session has stopped. Then unlock the car and try again. Some cars lock the cable while charging or while the car is locked. If it still will not release, check the car’s screen or app, or call the helpline shown on the charger.
Step 9 – Drive home
Once you’ve retrieved your charging cable, you are now free to drive away and go home.
Job done!
GET EXTRA MILES QUICKLY
Rapid Charging When You Go on a Trip
What will you learn in this section?
How to charge your car in public using a rapid charging point. This type of charging point is different to what you might have at home, if you got a home charger installed.
Where are these chargers located?
You’ll usually find rapid chargers in places where drivers are likely to stop during a longer journey. Common locations include motorway service stations, dedicated EV charging hubs, and some food and coffee chains, such as McDonald’s and Costa Coffee.
Why would someone want to use one of these chargers?
These high-powered ‘rapid’ chargers are designed to charge your battery very quickly. They are best used if you are on a long trip and running low on charge, or if you simply need to get miles into your battery quickly. Rapid chargers are generally more expensive than standard chargers, so use them sparingly if you can.
Step 1 – Park your car
Park your car in a designated EV charging parking space. These spaces are usually very clearly sign-posted and easy to find.
If you’ve done your homework above, you will already know where your car’s charging socket is – make sure you park so that the socket is close to the charger (you may need to reverse into the space).
Step 2 – Read the instructions and choose the right plug
Once parked, you will notice the charging point has its own cable and plug attached (if it doesn’t, go to the section above covering standard charging). In fact, there may be more than one plug to choose from.
Before plugging in or setting up payment, read the instructions on or next to the charging point itself. Different chargers do things in different orders. Some ask you to plug in first, then pay. Others ask you to tap your card, use an app, or use an RFID card first, then plug in.
Please note:
- If there is more than one plug to choose from, make sure you select the CCS plug. It is larger than a Type 2 plug and has two extra lower pins underneath. It may also be labelled ‘CCS’.
- Some older cars had a different charging system called ‘CHAdeMO’. You may still find CHAdeMO cables and plugs on some rapid chargers. Almost all modern fully electric cars supplied in the UK use CCS for rapid charging. If you are unsure, check your vehicle manual, handover pack, or Zapmap vehicle profile.
Step 3 – Connect the plug and authorise payment
Now follow the instructions shown on the charger in order.
If the charger tells you to plug in first, grab the CCS plug, and insert it into your car’s charging socket. You will need first to open the flap that protects the socket and possibly open or remove the plastic socket covers if you have them. Then follow the payment instructions on the charger.
If the charger tells you to pay first, tap your credit/debit card or phone in the designated area, or use the app or RFID card if required. Then, when the charger tells you to, get hold of the CCS plug and insert it into your car’s charging socket.
Please note:
- Rapid charging cables and plugs can be very heavy – don’t pull a muscle!
Step 4 – Follow any on-screen instructions
Once the cable is connected and payment has been authorised, the charger may start charging automatically. If it doesn’t, the screen may ask you to press a button that says ‘Start Charging’ or similar.
Please note:
- Some chargers place a temporary pre-authorisation hold on your card (e.g. £10, £20, £30, or higher) before charging starts. You should only be charged for the electricity you use, but the temporary hold may take a little while to disappear from your banking app.
- Some chargers may not have contactless payment. They may require an app, QR code, or RFID card instead. Read the instructions carefully before you start.
- If using a QR code, check it has not been stuck over another code. If it looks suspicious, use the official app, the contactless reader, or the operator’s website/app instead.
- If the screen on the charger is blank, or there is an error code, the charger may be broken. There should be a phone number on the charger you can call for help. If that doesn’t work, try another charger.
Step 5 – Check charging has started
Once you think you’ve got charging going, you then have to double-check the car really is charging.
There are different ways to confirm charging is taking place, depending on the specific charger you are using:
- Look at the charging point display if it has one – it should say ‘Charging in Progress’ or similar.
- Look at one of the displays inside your car – it should say that charging is taking place.
- If you used an app to set up the charging, the app should confirm that charging is in progress.
Step 6 – Leave the car
Now the car is charging, you can go off and do what you need to do. You don’t need to sit in the car while it’s charging, though you should lock the doors.
Bear in mind that rapid charging generally does what it says on the tin – it’s rapid! You may find that by the time you’ve been to the loo, got a coffee, and checked your emails, you have enough extra miles in your car to continue your journey.
Please note:
- It’s rarely worth rapid charging your battery past 80% full, unless you need the extra range to reach your destination or next charger. Why? Because the rapid charging speed slows down the fuller your battery gets. That last 20% can take a long time.
Important:
- On some chargers, you get charged a penalty fee if you leave your car plugged in once charging has stopped. This is to encourage people not to hog chargers while they have a lavish three-course meal. Read the instructions on the charger to see whether any extra fees apply.
Step 7 – Return to the car and stop charging
When you’ve finished doing what you’re doing, return to your car.
Follow the instructions on the charging point to stop the charge. There may be a ‘Stop Charging’ button (see the red circle in the photo), or the charger may ask you to tap the same card again or use the same app to stop the charging session.
After a few moments, charging will stop and the display should confirm this.
Please note:
- If your car’s battery reaches 100%, the charger will automatically stop charging, though you may still need to press a button, tap your card, or use the app to formally stop the charging process.
Step 8 – Unplug the cable
Once charging has stopped, you will be able to remove the plug from your car’s socket. Put the plug back where you originally took it from on the charger, and close your car’s charging socket flap (this happens automatically on some EVs).
Important:
- If you can’t unplug the cable, don’t pull hard. First check that the charging session has stopped. Then unlock the car and try again. Some cars lock the cable while charging or while the car is locked. If it still will not release, check the car’s screen or app, or call the helpline shown on the charger.
Step 9 – Drive away
You can now drive off to wherever you are going.
Well done – you did it!
ADVANCED
Public Charging Networks
The guidance above will get you started with charging your EV in public. But, once you are familiar with the basics, you can take things to the next level.
Paying by contactless is convenient, but it is not always the cheapest option. Instead, you can join ‘networks’ for lower prices, off-peak rates, or discounts. The network may send you a ‘roaming’ card in the post or it may all be app based.
Once signed up, there are three common ways to pay when you are at a public charger:
- Contactless credit/debit card
- The charger network’s own app or membership scheme
- A roaming app or RFID card that works across multiple networks
Here are a few examples of well-known public charging networks – click the names for helpful tips and advice.
Some Tesla chargers are open to non-Tesla EVs via the Tesla app, but not all. Check the Tesla app or Zapmap before trying to use one for the first time.
SUMMARY
Next Steps
The essentials
- Reread the guide above a couple of times until it all makes sense.
- Get familiar with where your car’s socket is and how to open and close the flap.
- Check your charging cable is in the boot.
- Find out where chargers are using Zapmap.
- Join a charging network if you wish.
Before a long trip
- Plan where you’re going to charge before you leave.
- Choose a backup charger nearby in case your first choice is busy or broken.
- Check live availability in Zapmap or the network app.
- Do not wait until the battery is nearly empty before looking for a charger.
- Make sure you have a payment card and any app you need already installed.
Charging etiquette
- Don’t park in an EV charging bay unless you’re charging.
- Move the car once charging has finished.
- Don’t rapid charge to 100% if others are waiting, unless you really need the range.
- Leave the charging cable and plug tidy when you’re done.
Good luck!
Don't just take our word for it. We're rated at 4.9/5 on independent reviews website Trustpilot from over 49,932 genuine customer reviews
Very professional, very knowledgeable, easy to lease a vehicle with this company
Delt with Leo Nicodemou He was really helpful and patient. Pleasure to work with.